Setting up a development environment#
The Bokeh project consists of two major components: the Bokeh package source code, written in Python, and the BokehJS client-side library, written in TypeScript.
Therefore, you need to set up two environments to contribute to Bokeh: A Python environment and a TypeScript environment. This chapter walks you through all the necessary steps to set up a full development environment.
1. Check basic requirements#
Install or update Git#
The Bokeh source code is stored in a Git source control repository. The first step to working on Bokeh is to install or update Git on your system.
There are different ways to do this, depending on whether you are using Windows, OSX, or Linux. To install Git on any platform, refer to the Installing Git section of the Pro Git Book.
If you have never used Git before, you can find links to several beginner tutorials and resources in the Git documentation.
Install or update conda#
Working on the Bokeh codebase requires installing several software packages that are not Python packages. For example, Node.js for TypeScript development or Selenium for testing and exporting.
To be able to manage Python and non-Python dependencies in one place, Bokeh uses
the conda package manager. conda is part of the free Anaconda Python
distribution available for Windows, macOS, and Linux. Conda creates and manages
virtual environments for you. Therefore, you don’t need tools like venv,
virtualenv, or pipenv. While it is technically possible to install all
dependencies manually without conda, this guide will assume that you have
conda installed.
To install or update Conda on your system, see Installation in the Conda documentation.
Note
If conda is already installed on your system, make sure it is up to date
by running the following command:
conda update -n base -c defaults conda
2. Fork and clone the repository#
The source code for the Bokeh project is hosted on GitHub, at bokeh/bokeh.
Unless you are a @bokeh/dev team member, you first need to create a fork of Bokeh’s main repository. While forking, make sure to uncheck the checkbox that limits copying to a specific branch (for example “Copy the branch-3.2 branch only”). For more information on creating a fork, see Fork a repo in GitHub Help.
Next, clone the version of the Bokeh repository you want to work on to a local
folder on your hard drive. Use git clone or follow the instructions for
cloning a forked repository in GitHub Help.
Cloning the repository creates a bokeh directory at your file system
location. This local bokeh directory is referred to as the source checkout
for the remainder of this document.
Before continuing, it is necessary to add the Bokeh repository as an additional upstream with the following commands:
git remote add upstream git@github.com:bokeh/bokeh.git
git fetch upstream
git remote add upstream https://github.com/bokeh/bokeh.git
git fetch upstream
3. Create a conda environment#
The Bokeh repository you just cloned to your local hard drive contains test environment files in the conda folder. In these files is all the necessary information to automatically create a basic development environment.
Use conda env create at the root level of your source checkout directory
to set up the environment and install all necessary packages. The “test”
environment files are versioned by Python version.
For example, to install an environment for Python 3.10, invoke:
conda env create -n bkdev -f conda/environment-test-3.10.yml
Note
Use the conda -n bkdev option to make bkdev the name of your
environment. The remainder of this chapter and all other chapters in this
guide assume that this is the name of your environment.
Then, activate the environment:
conda activate bkdev
Note
To update your local environment, use
conda env update --name bkdev -f conda/<environment file>. Updating your local
environment is necessary whenever the dependencies in the test environments
change. This can happen when the environment files are updated in the main
Bokeh repository or when you switch branches to work on different issues,
for example.
To learn more about creating and managing conda environments, see Managing environments in the Conda documentation.
4. Install Node packages#
Building BokehJS also requires installing JavaScript dependencies using
the Node Package Manager (npm). If you have followed the
instructions above,
conda has already installed the necessary npm and node.js
packages to your system.
Bokeh usually requires the latest major revision of npm. To install the
newest version globally, start from the top level of the source checkout
directory, and run the following commands:
cd bokehjs
npm install --location=global npm
If you do not want to install npm globally, leave out the --location=global
flag. In this case, you need to adjust all subsequent npm commands to use
the local version installed under bokehjs/node_modules.
Next, still in the bokehjs subdirectory, run the following command
to install all the JavaScript dependencies for BokehJS:
npm ci
This command installs the necessary packages into the node_modules
subdirectory.
Note
Typically, you only need to do this once when you first set up your local environment. However, if dependencies are added or changed, you need to repeat these steps to install and update the respective packages.
5. Set up pre-commit#
Bokeh uses pre-commit to help you prevent some common mistakes in your commits.
To set up pre-commit locally, run the following command from the top level of your source checkout directory:
python scripts/hooks/install.py
This configures pre-commit to use two Git hooks that will check your code whenever you push a commit to Bokeh’s GitHub repository:
- Codebase tests
git-commit will run Bokeh’s codebase tests to check for codebase quality issues such as whitespaces and imports. This includes testing with Ruff, ESLint, and isort.
- Protected branches
git-commit will make sure you don’t accidentally push a commit to Bokeh’s protected branches
mainandbranch-x.yon GitHub.
Note
Depending on your system, running those tests may take several dozen seconds. If any of the tests fail, check the output of your console. In most cases, this is where you will find the necessary information about what you need to change to pass the tests.
To uninstall the Git hooks, run the following command from the top level of your source checkout directory:
python scripts/hooks/uninstall.py
6. Build and install locally#
Once you have all the required dependencies installed, the simplest way to
build and install Bokeh and BokehJS is to use pip. pip is the package
installer for Python and is automatically installed when you
set up the conda environment.
Make sure you have activated the bkdev environment before running pip.
There are two ways to install a local development version of Bokeh with pip:
pip install -e .Bokeh will be installed to refer to your local source directory. Any changes you make to the Python source code will be available immediately without any additional steps. This is the recommended mode when working on the Bokeh codebase.
pip install .Bokeh will be installed in your local Python
site-packagesdirectory. In this mode, any changes to the Python source code will have no effect until you runpip install .again.
Running either of those two commands also builds and installs a local version of
BokehJS. If you want to skip building a new version of BokehJS and use a
different local version instead, set the BOKEHJS_ACTION environment variable:
BOKEHJS_ACTION="install" pip install -e .
Note
You need to rebuild BokehJS each time the BokehJS source code changes.
This can be necessary because you made changes yourself or because you
pulled updated code from GitHub. Re-run pip install -e . to build
and install BokehJS.
Occasionally, the list of JavaScript dependencies also changes. If this happens, you will need to re-run the instructions in the 4. Install Node packages section above before rebuilding BokehJS.
In case you update from a development environment based on Bokeh 2.3 or
older, you most likely also need to delete the bokehjs/build folder in
your local environment before building and installing a fresh BokehJS.
7. Download sample data#
Several tests and examples require Bokeh’s sample data to be available on your hard drive. After installing Bokeh, use the following command to download and install the data:
bokeh sampledata
You also have the opportunity to configure the download location or to start the download programmatically. See the Installing sample data section of the first steps guides for more details.
8. Set environment variables#
Bokeh uses environment variables to control several aspects of how the different parts of the library operate and interact.
To learn about all environment variables available in Bokeh, see bokeh.settings in the reference guide.
BOKEH_RESOURCES#
When working on Bokeh’s codebase, the most important environment variable to be
aware of is BOKEH_RESOURCES. This variable controls which version of
BokehJS to use.
By default, Bokeh downloads any necessary JavaScript code for BokehJS from a Content Delivery Network (CDN). If you have modified any BokehJS code and built BokehJS locally, you need to change how Bokeh loads those JavaScript resources. You will not see any effects of your local changes to BokehJS unless you configure Bokeh to use your local version of BokehJS instead of the default version from the CDN.
You have the following three options to use your local version of BokehJS:
- Use
absolute-dev Set
BOKEH_RESOURCEStoabsolute-devto load JavaScript resources from the static directory of your locally installed Bokeh library. This way, Bokeh will also use unminified BokehJS resources for improved readability.export BOKEH_RESOURCES=absolute-dev
$Env:BOKEH_RESOURCES = "absolute-dev"
set BOKEH_RESOURCES=absolute-dev- Use
inline Set
BOKEH_RESOURCEStoinlineto include all necessary local JavaScript resources directly inside the generated HTML file.export BOKEH_RESOURCES=inline
$Env:BOKEH_RESOURCES = "inline"
set BOKEH_RESOURCES=inline- Use
server-dev Set
BOKEH_RESOURCEStoserver-devto load your local BokehJS through a Bokeh server.First, start a local server.
BOKEH_DEV=true bokeh static
$Env:BOKEH_DEV = "true"
bokeh.exe static
set BOKEH_DEV=true
bokeh static
Next, open a new terminal window and set
BOKEH_RESOURCEStoserver-dev.export BOKEH_RESOURCES=server-dev
$Env:BOKEH_RESOURCES = "server-dev"
set BOKEH_RESOURCES=server-devThis way, you have access to more development functions, such as source maps to help debug the original TypeScript instead of the compiled JavaScript.
See Resources for more details.
BOKEH_DEV#
There are several other environment variables that are helpful when working on
Bokeh’s codebase. The most common settings for local development are combined in
the variable BOKEH_DEV.
To enable development settings, set BOKEH_DEV to true:
export BOKEH_DEV=true
$Env:BOKEH_DEV = "true"
set BOKEH_DEV=true
Setting BOKEH_DEV to true implies the following setup:
BOKEH_BROWSER=noneBOKEH_LOG_LEVEL=debugBOKEH_MINIFIED=falseBOKEH_PRETTY=trueBOKEH_PY_LOG_LEVEL=debugBOKEH_RESOURCES=server
but is not strictly equivalent to setting those variables individually.
This way, Bokeh will use local and unminified BokehJS resources, the default
log levels are increased, the generated HTML and JSON code will be more
human-readable, and Bokeh will not open a new browser window each time show()
is called.
Note
Setting BOKEH_DEV=true enables BOKEH_RESOURCES=server, which
requires a resources server. If needed, the user can provide such server
by running BOKEH_DEV=true bokeh static (on Linux) command separately
(e.g. in a another terminal or console).
Although using server resources for development is the most robust
approach, users can slightly simplify their setup by setting
BOKEH_RESOURCES to inline instead.
9. Test your local setup#
Run the following tests to check that everything is installed and set up correctly:
Test Bokeh core#
First, use the following command to test the Bokeh installation:
python -m bokeh info
You should see output similar to:
Python version      :  3.9.7 | packaged by conda-forge | (default, Sep 29 2021, 19:20:46)
IPython version     :  7.20.0
Tornado version     :  6.1
Bokeh version       :  3.0.0dev1+20.g6c394d579
BokehJS static path :  /opt/anaconda/envs/test/lib/python3.9/site-packages/bokeh/server/static
node.js version     :  v16.12.0
npm version         :  7.24.2
Operating system    :  Linux-5.11.0-40-generic-x86_64-with-glibc2.31
Run examples#
Next, run some of the standalone examples included with Bokeh.
Make sure the environment variable
BOKEH_RESOURCES is set to absolute-dev or inline in order to use
your local version of BokehJS. In the source checkout directory, run the
following command(s):
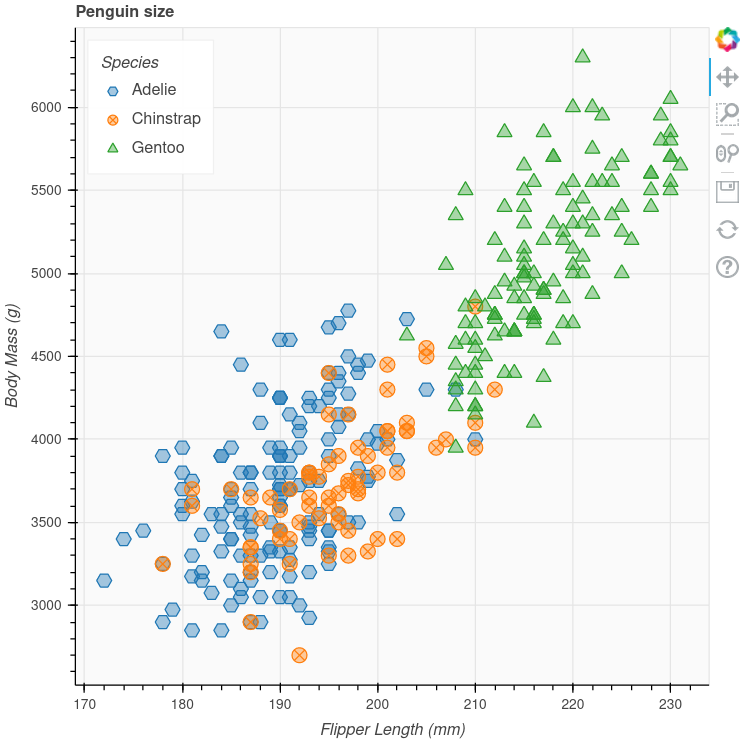
BOKEH_RESOURCES=inline python examples/basic/data/transform_markers.py
$Env:BOKEH_RESOURCES = "inline"
python.exe .\examples\basic\data\transform_markers.py
set BOKEH_RESOURCES=inline
python examples\basic\data\transform_markers.py
This creates a file transform_markers.html locally. When you open this file in
a web browser, it should display this visualization:
Run Bokeh Server#
Another way to use Bokeh is as a server. Set the
environment variable
BOKEH_DEV=false and run the bokeh serve command in the source
checkout directory:
BOKEH_DEV=false python -m bokeh serve --show examples/server/app/sliders.py
$Env:BOKEH_DEV = "False"
python.exe -m bokeh serve --show .\examples\server\app\sliders.py
set BOKEH_DEV=false
python -m bokeh serve --show examples\server\app\sliders.py
This should open up a browser with an interactive figure:
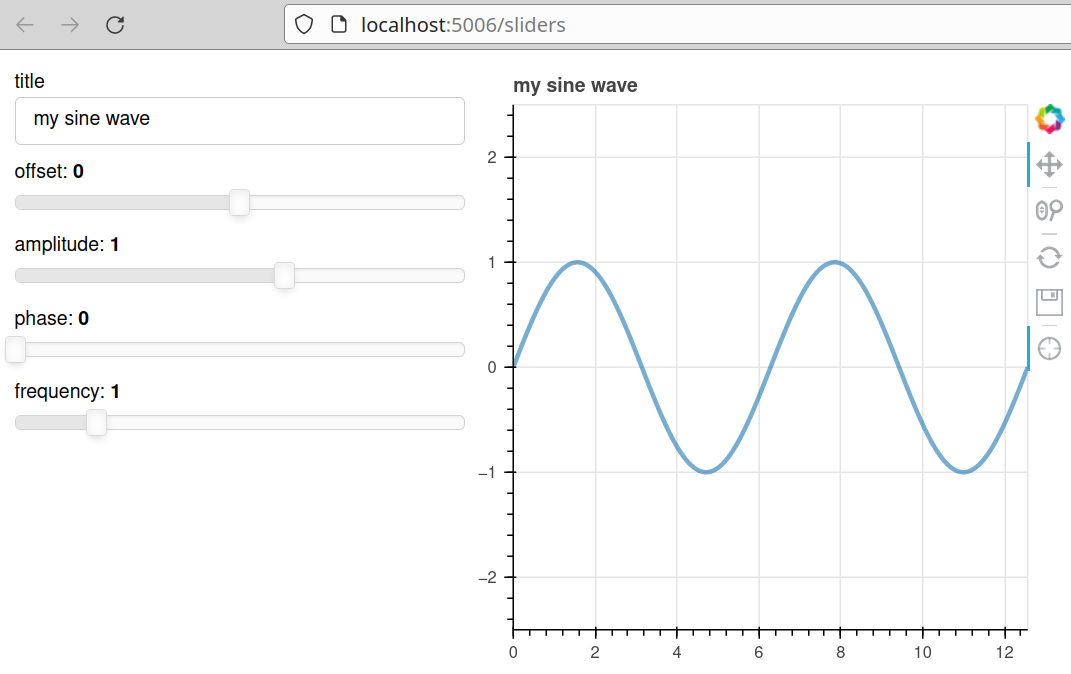
All the sliders allow interactive control of the sine wave, with each update
redrawing the line with the new parameters. The --show option opens a
web browser. The default URL for the Bokeh server is localhost:5006.
Troubleshooting#
Updating an existing development environment does not always work as expected. As a general rule, make sure your conda environment, Node packages, and local build are always up to date.
The following list contains solutions to common issue that you might encounter when setting up a development environment:
Git tags missing (KeyError: '0.0.1')
Sometimes you may run into issues if the tags of the Bokeh repository have not
been cloned to your local directory. You might see a KeyError: '0.0.1' on your
console output, for example.
To check if the necessary tags are present, run the following command:
git tag -l | tail
git tag -l
git tag -l
If there are no tags present, make sure that you follow the steps of setting the Bokeh repository as an additional upstream.
Git commit fails due to line endings (test_code_quality.py, File
contains carriage returns)
On Windows systems, you may get a File contains carriage returns at end of line:
<file path> error while trying to push your local branch to your remote branch on
GitHub. This is because Bokeh only allows LF line endings, while some Windows-based
tools may add CR LF line endings.
If you see this error, try running the following command:
git config --global core.autocrlf false. After running this command, delete and
re-clone your forked repository (see 2. Fork and clone the repository)
This command configures git to always preserves the original LF-only newlines. See the GitHub documentation or Git config documentation for other options.
Errors after updating from an older version
If you keep getting errors after updating an older environment, use
conda remove --name bkdev --all, delete your local bokeh folder,
and reinstall your development environment, following the steps in this guide
from the beginning.
For more information on running and installing Bokeh, check the additional resources available to contributors. Please feel free to ask at the Bokeh Discourse or Bokeh’s contributor Slack.