Styling Visual Attributes
Using Palettes
Palettes are sequences (lists or tuples) of RGB(A) hex strings that define a
colormap and be can set as the palette attribute of all chart types from
bokeh.charts and as the color attribute of many plot objects from
bokeh.plotting. Bokeh offers many of the standard Brewer palettes, which
can be imported from the bokeh.palettes module. For example, importing
“Spectral6” gives a six element list of RGB(A) hex strings from the Brewer
“Spectral” colormap.
>>> from bokeh.palettes import Spectral6
>>> Spectral6
['#3288bd', '#99d594', '#e6f598', '#fee08b', '#fc8d59', '#d53e4f']
All of the standard palettes included in bokeh can be found at bokeh.palettes. Custom palettes can be made by creating sequences of RGB(A) hex strings.
Visual Properties
In order to style the visual attributes of Bokeh plots, you first must know what the available properties are. The full Reference Guide will list all the properties of every object individually, though there are three broad groups of properties that show up often. They are:
- line properties line color, width, etc.
- fill properties fill color, alpha, etc.
- text properties font styles, colors, etc.
Below is more detail about each of these.
Line Properties
line_color- color to use to stroke lines with
line_width- line stroke width in units of pixels
line_alpha- floating point between 0 (transparent) and 1 (opaque)
line_joinhow path segments should be joined together
'miter'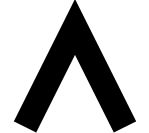
'round'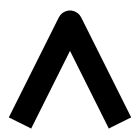
'bevel'
line_caphow path segments should be terminated
'butt'
'round'
'square'
line_dasha line style to use
'solid''dashed''dotted''dotdash''dashdot'- an array of integer pixel distances that describe the on-off pattern of dashing to use
- a string of spaced integers matching the regular expression ‘^(\d+(\s+\d+)*)?$’ that describe the on-off pattern of dashing to use
line_dash_offset- the distance in pixels into the
line_dashthat the pattern should start from
Fill Properties
fill_color- color to use to fill paths with
fill_alpha- floating point between 0 (transparent) and 1 (opaque)
Text Properties
text_font- font name, e.g.,
'times','helvetica' text_font_size- font size in px, em, or pt, e.g.,
'12pt','1.5em' text_font_stylefont style to use
'normal'normal text'italic'italic text'bold'bold text
text_color- color to use to render text with
text_alpha- floating point between 0 (transparent) and 1 (opaque)
text_align- horizontal anchor point for text:
'left','right','center' text_baselinevertical anchor point for text
'top''middle''bottom''alphabetic''hanging'
Note
There is currently only support for filling text. An interface to stroke the outlines of text has not yet been exposed.
Specifying Colors
Colors properties are used in many places in Bokeh, to specify the colors to use for lines, fills or text. Color values can be provided in any of the following ways:
- any of the 147 named CSS colors, e.g
'green','indigo' - an RGB(A) hex value, e.g.,
'#FF0000','#44444444' - a 3-tuple of integers (r,g,b) between 0 and 255
- a 4-tuple of (r,g,b,a) where r, g, b are integers between 0 and 255 and a is a floating point value between 0 and 1
Color alpha can be specified in multiple ways for the visual properties. This
can be by specifying the alpha directly with line|fill_alpha, or by
providing the alpha through the RGBA 4-tuple for the line|fill_color.
Additionally, there is also the freedom to use a combination of the two, or no alpha at all. The following figure demonstrates each possible combination of the inputs for line and fill alphas:
Note
If using the bokeh.plotting interface, another option is to specify
color and/or alpha as a keyword, as well as the demonstrated color
properties. These inputs work by applying the provided value to both of the
corresponding line and fill properties. However, you can still
provide fill|line_alpha or fill|line_color in combination with
the color/alpha keywords, and the former will take precedence.
Selecting Plot Objects
As described in Defining Key Concepts, Bokeh plots comprise graphs of
objects that represent all the different parts of the plot: grids, axes,
glyphs, etc. In order to style Bokeh plots, it is necessary to first find
the right object, then set its various attributes. Some objects have
convenience methods to help find the objects of interest (see Axes,
Grids, and Legends). But there is also a select() method on Plot
that can be used to query for Bokeh plot objects more generally.
For example, you can query for objects by type. The following snippet returns all the PanTool objects a plot has:
>>> p.select(type=PanTool)
[<bokeh.models.tools.PanTool at 0x106608b90>]
The select() method can query on other attributes as well:
>>> p.circle(0, 0, name="mycircle")
<bokeh.plotting.Figure at 0x106608810>

>>> p.select(name="mycircle")
[<bokeh.models.renderers.GlyphRenderer at 0x106a4c810>]
This sort of query can be especially useful for styling visual attributes of Glyphs.
Plots
Plot objects themselves have many visual characteristics that can be styled:
the dimensions of the plot, backgrounds, borders, outlines, etc. This section
describes how to change these attributes of a Bokeh plot. The example code
primarily uses the bokeh.plotting interface to create plots, however the
instructions apply regardless of how a Bokeh plot was created.
Dimensions
The dimensions (width and height) of a Plot are controlled by plot_width
and plot_height attributes. These values are in screen units, and they
control the size of the entire canvas area, including any axes or titles (but
not the toolbar). If you are using the bokeh.plotting or bokeh.charts
interfaces, then these values can be passed to figure() or the Chart function
as a convenience:
from bokeh.plotting import figure, output_file, show

output_file("dimensions.html")

# create a new plot with a title
p = figure(plot_width=700)
p.plot_height = 300

p.circle([1, 2, 3, 4, 5], [2, 5, 8, 2, 7], size=10)

show(p)
Responsive Dimensions
In addition, you can use the responsive attribute. The responsive attribute
causes the plot to fill the container it’s sitting in, and to respond to
changes in browser size. Responsive web elements are common-place in web
development and the responsive flag may be useful if you are trying to
present your plot on a website where you want it to conform to a number of
browsers. If you set the responsive flag, the plot_width and plot_height will
immediately change when a plot is rendered to fill the container. However,
those parameters will be used to calculate the initial aspect ratio for your
plot, so you may want to keep them. Plots will only resize down to a minimum of
100px (height or width) to prevent problems in displaying your plot.
Warning
This feature is known not to work when combined with HBox. This is a new feature and may have other issues when used in different circumstances. Please report these issues on the Bokeh GitHub repository or the Bokeh mailing list.
Title
The styling of the plot title is controlled by a set of Text Properties
on the Plot, that are prefixed with title_. For instance, to set the
color of the title text, use title_text_color:
from bokeh.plotting import figure, output_file, show

output_file("title.html")

# create a new plot with a title
p = figure(plot_width=400, plot_height=400, title="Some Title")
p.title_text_color = "olive"
p.title_text_font = "times"
p.title_text_font_style = "italic"

p.circle([1, 2, 3, 4, 5], [2, 5, 8, 2, 7], size=10)

show(p)
Background
The background fill style is controlled by the background_fill_color and
background_fill_alpha properties of the Plot object:
from bokeh.plotting import figure, output_file, show

output_file("background.html")

# create a new plot with a title
p = figure(plot_width=400, plot_height=400)
p.background_fill_color = "beige"
p.background_fill_alpha = 0.5

p.circle([1, 2, 3, 4, 5], [2, 5, 8, 2, 7], size=10)

show(p)
Border
The border fill style is controlled by the border_fill_color and
border_fill_alpha properties of the Plot object. You can also set the
minimum border on each side (in screen units) with the properties
min_border_left
min_border_right
min_border_top
min_border_bottom
Additionally, setting min_border will apply a minimum border setting
to all sides as a convenience. The min_border default value is 40px.
from bokeh.plotting import figure, output_file, show

output_file("border.html")

# create a new plot with a title
p = figure(plot_width=400, plot_height=400)
p.border_fill_color = "whitesmoke"
p.min_border_left = 80

p.circle([1,2,3,4,5], [2,5,8,2,7], size=10)

show(p)
Outline
The styling of the outline of the plotting area is controlled by a set of
Line Properties on the Plot, that are prefixed with outline_. For
instance, to set the color of the outline, use outline_line_color:
from bokeh.plotting import figure, output_file, show

output_file("outline.html")

# create a new plot with a title
p = figure(plot_width=400, plot_height=400)
p.outline_line_width = 7
p.outline_line_alpha = 0.3
p.outline_line_color = "navy"

p.circle([1,2,3,4,5], [2,5,8,2,7], size=10)

show(p)
Glyphs
To style the fill, line, or text properties of a glyph, it is first
necessary to obtain a specific GlyphRenderer. When using the
bokeh.plotting interface, the glyph functions return the renderer:
>>> r = p.circle([1,2,3,4,5], [2,5,8,2,7])
>>> r
<bokeh.models.renderers.GlyphRenderer at 0x106a4c810>
Then, the glyph itself is obtained from the .glyph attribute of a
GlyphRenderer:
>>> r.glyph
<bokeh.models.markers.Circle at 0x10799ba10>
This is the object to set fill, line, or text property values for:
from bokeh.plotting import figure, output_file, show

output_file("axes.html")

p = figure(plot_width=400, plot_height=400)
r = p.circle([1,2,3,4,5], [2,5,8,2,7])

glyph = r.glyph
glyph.size = 60
glyph.fill_alpha = 0.2
glyph.line_color = "firebrick"
glyph.line_dash = [6, 3]
glyph.line_width = 2

show(p)
Selected and Unselected Glyphs
The styling of selected and non-selected glyphs can be customized by
setting the selection_glyph and/or nonselection_glyph attributes
of the GlyphRenderer either manually or by passing them to add_glyph().
The plot below demonstrates how to set these attributes using the bokeh.plotting interface. Click or tap circles on the plot to see the effect on the selected and nonselected glyphs. To clear the selection and restore the original state, click anywhere in the plot outside of a circle.
from bokeh.io import output_file, show
from bokeh.plotting import figure
from bokeh.models import Circle

output_file("styling_selections.html")

plot = figure(plot_width=400, plot_height=400, tools="tap", title="Select a circle")
renderer = plot.circle([1, 2, 3, 4, 5], [2, 5, 8, 2, 7], size=50)

selected_circle = Circle(fill_alpha=1, fill_color="firebrick", line_color=None)
nonselected_circle = Circle(fill_alpha=0.2, fill_color="blue", line_color="firebrick")

renderer.selection_glyph = selected_circle
renderer.nonselection_glyph = nonselected_circle

show(plot)
If you just need to set the color or alpha parameters of the selected or
nonselected glyphs, this can be accomplished even more simply by providing
color and alpha arguments to the glyph function, prefixed by "selection_"
or "nonselection_". The plot below demonstrates this technique:
from bokeh.io import output_file, show
from bokeh.plotting import figure

output_file("styling_selections.html")

plot = figure(plot_width=400, plot_height=400, tools="tap", title="Select a circle")
renderer = plot.circle([1, 2, 3, 4, 5], [2, 5, 8, 2, 7], size=50,

                       # set visual properties for selected glyphs
                       selection_color="firebrick",

                       # set visual properties for non-selected glyphs
                       nonselection_fill_alpha=0.2,
                       nonselection_fill_color="blue",
                       nonselection_line_color="firebrick",
                       nonselection_line_alpha=1.0)

show(plot)
The same could also be achieved with the models interface as follows:
p = Plot()
source = ColumnDataSource(dict(x=[1, 2, 3], y=[1, 2, 3]))

initial_circle = Circle(x='x', y='y', fill_color='blue', size=50)
selected_circle = Circle(fill_alpha=1, fill_color="firebrick", line_color=None)
nonselected_circle = Circle(fill_alpha=0.2, fill_color="blue", line_color="firebrick")

p.add_glyph(source,
            initial_circle,
            selection_glyph=selected_circle,
            nonselection_glyph=nonselected_circle)
Note
Only the visual properties of selection_glyph and
nonselection_glyph are considered when rendering. Changing
positions, sizes, etc. will have no effect.
Hover Inspections
Setting the highlight policy for glyphs that are hovered over is completely
analogous to setting the selection_glyph or nonselection_glyph, or
by passing color or alpha parameters prefixed with "hover_". The example
below demonstrates the latter method:
from bokeh.plotting import figure, output_file, show
from bokeh.models import HoverTool
from bokeh.sampledata.glucose import data

output_file("styling_hover.html")

subset = data.ix['2010-10-06']

x, y = subset.index.to_series(), subset['glucose']

# Basic plot setup
plot = figure(width=600, height=300, x_axis_type="datetime", tools="",
              toolbar_location=None, title='Hover over points')

plot.line(x, y, line_dash="4 4", line_width=1, color='gray')

cr = plot.circle(x, y, size=20,
                fill_color="grey", hover_fill_color="firebrick",
                fill_alpha=0.05, hover_alpha=0.3,
                line_color=None, hover_line_color="white")

plot.add_tools(HoverTool(tooltips=None, renderers=[cr], mode='hline'))

show(plot)
Note
Only the visual properties of hover_glyph are considered when
rendering. Changing positions, sizes, etc. will have no effect.
Tools
Some Bokeh tools also have configurable visual attributes. For instance the
various region selection tools and box zoom tool all have an overlay
whose line and fill properties may be set:
import numpy as np

from bokeh.models import BoxSelectTool, BoxZoomTool, LassoSelectTool
from bokeh.plotting import figure, output_file, show

output_file("styling_tool_overlays.html")

x = np.random.random(size=200)
y = np.random.random(size=200)

# Basic plot setup
plot = figure(width=400, height=400, title='Select and Zoom',
              tools="box_select,box_zoom,lasso_select,reset")

plot.circle(x, y, size=5)

plot.select_one(BoxSelectTool).overlay.fill_color = "firebrick"
plot.select_one(BoxSelectTool).overlay.line_color = None

plot.select_one(BoxZoomTool).overlay.line_color = "olive"
plot.select_one(BoxZoomTool).overlay.line_width = 8
plot.select_one(BoxZoomTool).overlay.line_dash = "solid"
plot.select_one(BoxZoomTool).overlay.fill_color = None

plot.select_one(LassoSelectTool).overlay.line_dash = [10, 10]

show(plot)
Axes
In this section you will learn how to change various visual properties of Bokeh plot axes.
To set style attributes on Axis objects, use the xaxis, yaxis, and
axis methods on Plot to first obtain a plot’s Axis objects:
>>> p.xaxis
[<bokeh.models.axes.LinearAxis at 0x106fa2390>]
This returns a list of Axis objects (since there may be more than one). But note that, as convenience, these lists are splattable, meaning that you can set attributes directly on this result, and the attributes will be applied to all the axes in the list:
p.xaxis.axis_label = "Temperature"
will change the value of axis_label for every x-axis (however
many there may be).
Below is code that will set some of the properties of axes. You can execute this code, and try setting other properties as well.
from bokeh.plotting import figure, output_file, show

output_file("axes.html")

p = figure(plot_width=400, plot_height=400)
p.circle([1,2,3,4,5], [2,5,8,2,7], size=10)

# change just some things about the x-axes
p.xaxis.axis_label = "Temp"
p.xaxis.axis_line_width = 3
p.xaxis.axis_line_color = "red"

# change just some things about the y-axes
p.yaxis.axis_label = "Pressure"
p.yaxis.major_label_text_color = "orange"
p.yaxis.major_label_orientation = "vertical"

# change things on all axes
p.axis.minor_tick_in = -3
p.axis.minor_tick_out = 6

show(p)
Labels
The text of an overall label for an axis is controlled by the axis_label
property. Additionally, there are Text Properties prefixed with
axis_label_ that control the visual appearance of the label. For instance
to set the color of the label, set axis_label_text_color. Finally, to
change the distance between the axis label and the major tick labels, set
the axis_label_standoff property:
from bokeh.plotting import figure, output_file, show

output_file("bounds.html")

p = figure(plot_width=400, plot_height=400)
p.circle([1,2,3,4,5], [2,5,8,2,7], size=10)

p.xaxis.axis_label = "Lot Number"
p.xaxis.axis_label_text_color = "#aa6666"
p.xaxis.axis_label_standoff = 30

p.yaxis.axis_label = "Bin Count"
p.yaxis.axis_label_text_font_style = "italic"

show(p)
Bounds
Sometimes it is useful to limit the bounds where axes are drawn. This can be
accomplished by setting the bounds property of an axis object to a 2-tuple
of (start, end):
from bokeh.plotting import figure, output_file, show

output_file("bounds.html")

p = figure(plot_width=400, plot_height=400)
p.circle([1,2,3,4,5], [2,5,8,2,7], size=10)

p.xaxis.bounds = (2, 4)

show(p)
Tick Locations
Bokeh has several “ticker” models that can choose nice locations for ticks.
These are configured on the .ticker property of an axis. With the
bokeh.plotting and bokeh.charts interfaces, choosing an appropriate ticker
type (categorical, datetime, linear or log scale) normally happens
automatically. However, there are cases when more explicit control is
useful.
FixedTicker
This ticker model allows users to specify exact tick locations explicitly.
from bokeh.plotting import figure, output_file, show
from bokeh.models import FixedTicker

output_file("axes.html")

p = figure(plot_width=400, plot_height=400)
p.circle([1,2,3,4,5], [2,5,8,2,7], size=10)

p.xaxis[0].ticker=FixedTicker(ticks=[2, 3.5, 4])

show(p)
Tick Lines
The visual appearance of the major and minor ticks is controlled by
a collection of Line Properties, prefixed with major_tick_ and
minor_tick_, respectively. For instance, to set the color of the
major ticks, use major_tick_line_color. To hide either set of ticks,
set the color to None. Additionally, you can control how far in and
out of the plotting area the ticks extend, with the properties
major_tick_in/major_tick_out and minor_tick_in/minor_tick_out.
These values are in screen units, and negative values are acceptable.
from bokeh.plotting import figure, output_file, show

output_file("axes.html")

p = figure(plot_width=400, plot_height=400)
p.circle([1,2,3,4,5], [2,5,8,2,7], size=10)

p.xaxis.major_tick_line_color = "firebrick"
p.xaxis.major_tick_line_width = 3
p.xaxis.minor_tick_line_color = "orange"

p.yaxis.minor_tick_line_color = None

p.axis.major_tick_out = 10
p.axis.minor_tick_in = -3
p.axis.minor_tick_out = 8

show(p)
Tick Label Formats
The text styling of axis labels is controlled by a TickFormatter object
configured on the axis’ formatter property. Bokeh uses a number of ticker
formatters by default in different situations:
BasicTickFormatter— Default formatter for linear axes.CategoricalTickFormatter— Default formatter for categorical axes.DatetimeTickFormatter— Default formatter for datetime axes.LogTickFormatter— Default formatter for log axes.
These default tick formatters do not expose many configurable properties.
To control tick formatting at a finer grained level, use one of the
NumeralTickFormatter or PrintfTickFormatter described below.
Note
To replace a tick formatter on an Axis, you must set the formatter
property on an actual Axis object, not on a splattable list. This is
why p.yaxis[0].formatter, etc. (with the subscript [0]) is used.
NumeralTickFormatter
The NumeralTickFormatter has a format property that can be used
to control the text formatting of axis ticks.
from bokeh.plotting import figure, output_file, show
from bokeh.models import NumeralTickFormatter

output_file("gridlines.html")

p = figure(plot_width=400, plot_height=400)
p.circle([1,2,3,4,5], [2,5,8,2,7], size=10)

p.xaxis[0].formatter = NumeralTickFormatter(format="0.0%")
p.yaxis[0].formatter = NumeralTickFormatter(format="$0.00")

show(p)
Many additional formats are available, see the full NumeralTickFormatter
documentation in the Reference Guide.
PrintfTickFormatter
The PrintfTickFormatter has a format property that can be used
to control the text formatting of axis ticks using printf style
format strings.
from bokeh.plotting import figure, output_file, show
from bokeh.models import PrintfTickFormatter

output_file("gridlines.html")

p = figure(plot_width=400, plot_height=400)
p.circle([1,2,3,4,5], [2,5,8,2,7], size=10)

p.xaxis[0].formatter = PrintfTickFormatter(format="%4.1e")
p.yaxis[0].formatter = PrintfTickFormatter(format="%5.3f mu")

show(p)
For full details about formats, see the full PrintfTickFormatter
documentation in the Reference Guide.
Tick Label Orientation
The orientation of major tick labels can be controlled with the
major_label_orientation property. This property accepts the
values "horizontal" or "vertical" or a floating point number
that gives the angle (in radians) to rotate from the horizontal:
from math import pi
from bokeh.plotting import figure, output_file, show

output_file("gridlines.html")

p = figure(plot_width=400, plot_height=400)
p.circle([1,2,3,4,5], [2,5,8,2,7], size=10)

p.xaxis.major_label_orientation = pi/4
p.yaxis.major_label_orientation = "vertical"

show(p)
There are more properties that Bokeh axes support configuring. For a complete listing of all the various attributes that can be set on different types of Bokeh axes, consult the bokeh.models.axes section of the Reference Guide.
Grids
In this section you will learn how to set the visual properties of grid lines and grid bands on Bokeh plots.
Similar to the convenience methods for axes, there are xgrid, ygrid,
and grid methods on Plot that can be used to obtain a plot’s Grid
objects:
>>> p.grid
[<bokeh.models.grids.Grid at 0x106fa2278>,
 <bokeh.models.grids.Grid at 0x106fa22e8>]
These methods also return splattable lists, so that you can set an attribute on the list, as if it was a single object, and the attribute is changed for every element of the list:
p.grid.line_dash = [4 2]
Note
The xgrid property provides the grid objects that intersect the
x-axis (i.e., are vertical). Correspondingly, ygrid provides
the grid objects that intersect the y-axis (i.e., are horizontal).
Lines
The visual appearance of grid lines is controlled by a collection of
Line Properties, prefixed with grid_. For instance, to set the
color of grid lines, use grid_line_color. To hide grid lines, set
their line color to None.
from bokeh.plotting import figure, output_file, show

output_file("gridlines.html")

p = figure(plot_width=400, plot_height=400)
p.circle([1,2,3,4,5], [2,5,8,2,7], size=10)

# change just some things about the x-grid
p.xgrid.grid_line_color = None

# change just some things about the y-grid
p.ygrid.grid_line_alpha = 0.5
p.ygrid.grid_line_dash = [6, 4]

show(p)
Minor Lines
The visual appearance of minor grid lines is controlled by a collection of
Line Properties, prefixed with minor_grid_. For instance, to set the
color of grid lines, use minor_grid_line_color. By default, minor grid
lines are hidden (i.e., their line color is set to None).
from bokeh.plotting import figure, output_file, show

output_file("minorgridlines.html")

p = figure(plot_width=400, plot_height=400)
p.circle([1,2,3,4,5], [2,5,8,2,7], size=10)

# change just some things about the y-grid
p.ygrid.minor_grid_line_color = 'navy'
p.ygrid.minor_grid_line_alpha = 0.1

show(p)
Bands
It is also possible to display filled, shaded bands between adjacent
grid lines. The visual appearance of these bands is controlled by a
collection of Fill Properties, prefixed with band_. For instance,
to set the color of grid bands, use band_fill_color. To hide grid
bands, set their fill color to None (this is the default).
from bokeh.plotting import figure, output_file, show

output_file("gridbands.html")

p = figure(plot_width=400, plot_height=400)
p.circle([1,2,3,4,5], [2,5,8,2,7], size=10)

# change just some things about the x-grid
p.xgrid.grid_line_color = None

# change just some things about the y-grid
p.ygrid.band_fill_alpha = 0.1
p.ygrid.band_fill_color = "navy"

show(p)
Bounds
Grids also support setting explicit bounds between which they are drawn. They are set in an identical fashion to axes bounds, with a 2-tuple of (start, end):
from bokeh.plotting import figure, output_file, show

output_file("bounds.html")

p = figure(plot_width=400, plot_height=400)
p.circle([1,2,3,4,5], [2,5,8,2,7], size=10)

p.grid.bounds = (2, 4)

show(p)
There are other properties that Bokeh grids support configuring. For a complete listing of all the various attributes that can be set on Bokeh plot grids, consult the bokeh.models.grids section of the Reference Guide.
Legends
Similar to the convenience methods for axes and grids, there is a
legend method on Plot that can be used to obtain a plot’s legend
objects:
>>> p.legend
[<bokeh.models.annotations.Legend at 0x106fa2278>]
This method also returns a splattable list, so that you can set an attribute on the list, as if it was a single object, and the attribute is changed for every element of the list:
p.legend.label_text_font = "times"
Note
The examples in this section use NumPy to more easily generate better data suitable for demonstrating legends.
Location
The location of the legend labels is controlled by the location
property. Valid values for this property are either:
"top_left"
"top_center"
"top_right" (the default)
"right_center"
"bottom_right"
"bottom_center"
"bottom_left"
"left_center"
"center"
or a (x, y) tuple indicating an absolute location in screen coordinates
(pixels from the bottom-left corner).
import numpy as np
from bokeh.plotting import figure, show, output_file

x = np.linspace(0, 4*np.pi, 100)
y = np.sin(x)

output_file("legend_labels.html")

p = figure()

p.circle(x, y, legend="sin(x)")
p.line(x, y, legend="sin(x)")

p.line(x, 2*y, legend="2*sin(x)",
       line_dash=[4, 4], line_color="orange", line_width=2)

p.square(x, 3*y, legend="3*sin(x)", fill_color=None, line_color="green")
p.line(x, 3*y, legend="3*sin(x)", line_color="green")

p.legend.location = "bottom_left"

show(p)
Note
It is currently not possible to position a legend outside the plot area, or in an optimal, automatically computed location within the canvas. These and other improvements are planned.
Label Text
The visual appearance of the legend labels is controlled by a collection of
Text Properties, prefixed with label_. For instance, to set the font
style of the labels, use label_text_font_style.
import numpy as np
from bokeh.plotting import output_file, figure, show

x = np.linspace(0, 4*np.pi, 100)
y = np.sin(x)

output_file("legend_labels.html")

p = figure()

p.circle(x, y, legend="sin(x)")
p.line(x, y, legend="sin(x)")

p.line(x, 2*y, legend="2*sin(x)",
       line_dash=[4, 4], line_color="orange", line_width=2)

p.square(x, 3*y, legend="3*sin(x)", fill_color=None, line_color="green")
p.line(x, 3*y, legend="3*sin(x)", line_color="green")

p.legend.label_text_font = "times"
p.legend.label_text_font_style = "italic"
p.legend.label_text_color = "navy"

show(p)
Border
The visual appearance of the legend border is controlled by a collection of
Line Properties, prefixed with border_. For instance, to set the color
of the border, use border_line_color. To make the border invisible, set
the border line color to None.
import numpy as np
from bokeh.plotting import output_file, figure, show

x = np.linspace(0, 4*np.pi, 100)
y = np.sin(x)

output_file("legend_border.html")

p = figure()

p.circle(x, y, legend="sin(x)")
p.line(x, y, legend="sin(x)")

p.line(x, 2*y, legend="2*sin(x)",
       line_dash=[4, 4], line_color="orange", line_width=2)

p.square(x, 3*y, legend="3*sin(x)", fill_color=None, line_color="green")
p.line(x, 3*y, legend="3*sin(x)", line_color="green")

p.legend.border_line_width = 3
p.legend.border_line_color = "navy"
p.legend.border_line_alpha = 0.5

show(p)
Background
The visual appearance of the legend background is controlled by a collection
of Fill Properties, prefixed with background_. For instance, to set the
color of the background, use background_fill_color. To make the background
transparent, set the background_fill_alpha to 0.
import numpy as np
from bokeh.plotting import output_file, figure, show

x = np.linspace(0, 4*np.pi, 100)
y = np.sin(x)

output_file("legend_background.html")

p = figure()

p.circle(x, y, legend="sin(x)")
p.line(x, y, legend="sin(x)")

p.line(x, 2*y, legend="2*sin(x)",
       line_dash=[4, 4], line_color="orange", line_width=2)

p.square(x, 3*y, legend="3*sin(x)", fill_color=None, line_color="green")
p.line(x, 3*y, legend="3*sin(x)", line_color="green")

#  3*sin(x) curve should be under this legend at initial viewing, so
# we can see that the legend is transparent
p.legend.location = "bottom_right"
p.legend.background_fill_color = "navy"
p.legend.background_fill_alpha = 0.5

show(p)
Dimensions
There are several properties that can be used to control the layout, spacing, etc. of the legend components:
-
label_standoff¶ property type: label_standoff:Int
The distance (in pixels) to separate the label from its associated glyph.
-
label_width¶ property type: label_width:Int
The width (in pixels) of the area that legend labels should occupy.
-
label_height¶ property type: label_height:Int
The height (in pixels) of the area that legend labels should occupy.
-
glyph_width¶ property type: glyph_width:Int
The width (in pixels) that the rendered legend glyph should occupy.
-
glyph_height¶ property type: glyph_height:Int
The height (in pixels) that the rendered legend glyph should occupy.
-
legend_padding¶ property type: legend_padding:Int
Amount of padding around the legend.
-
legend_spacing¶ property type: legend_spacing:Int
Amount of spacing between legend entries.
import numpy as np
from bokeh.plotting import output_file, figure, show

x = np.linspace(0, 4*np.pi, 100)
y = np.sin(x)

output_file("legend_labels.html")

p = figure()

p.circle(x, y, legend="sin(x)")
p.line(x, y, legend="sin(x)")

p.line(x, 2*y, legend="2*sin(x)",
       line_dash=[4, 4], line_color="orange", line_width=2)

p.square(x, 3*y, legend="3*sin(x)", fill_color=None, line_color="green")
p.line(x, 3*y, legend="3*sin(x)", line_color="green")

p.legend.label_standoff = 5
p.legend.glyph_width = 50
p.legend.legend_spacing = 10
p.legend.legend_padding = 50

show(p)